How to Use a Blood Glucose Meter, CGM & Ketone Strips in NZ — CareSens, Dexcom G6, G7, Freestyle Libre | KiwiMeds
📊 How to Use a Blood Glucose Meter & CGM
Covers: CareSens N meter • Freestyle Libre 3 Plus • Dexcom ONE+
📋 Jump to your device or test strip:
1. CareSens N Blood Glucose Meter
- 1Wash and dry your hands thoroughly. Do not use alcohol wipes on your finger before testing — residual alcohol can affect results. Warm hands give better blood flow.
- 2Insert a CareSens test strip into the meter — it will turn on automatically.
- 3Use the lancing device on the side of a fingertip (not the pad — less painful). Prick and gently squeeze to produce a small drop of blood.
- 4Touch the blood drop to the tip of the test strip (not the top). The meter will beep and display the result in mmol/L within 5 seconds.
- 5Record the result in your diabetes diary or app. Dispose of lancet safely in a sharps container.
• Before meals: 4.0–7.0 mmol/L
• 2 hours after meals: <10.0 mmol/L
• Bedtime: 6.0–10.0 mmol/L
Your personal targets may differ — always follow your diabetes team’s advice.
2. CareSens Dual — Blood Glucose & Ketone Meter
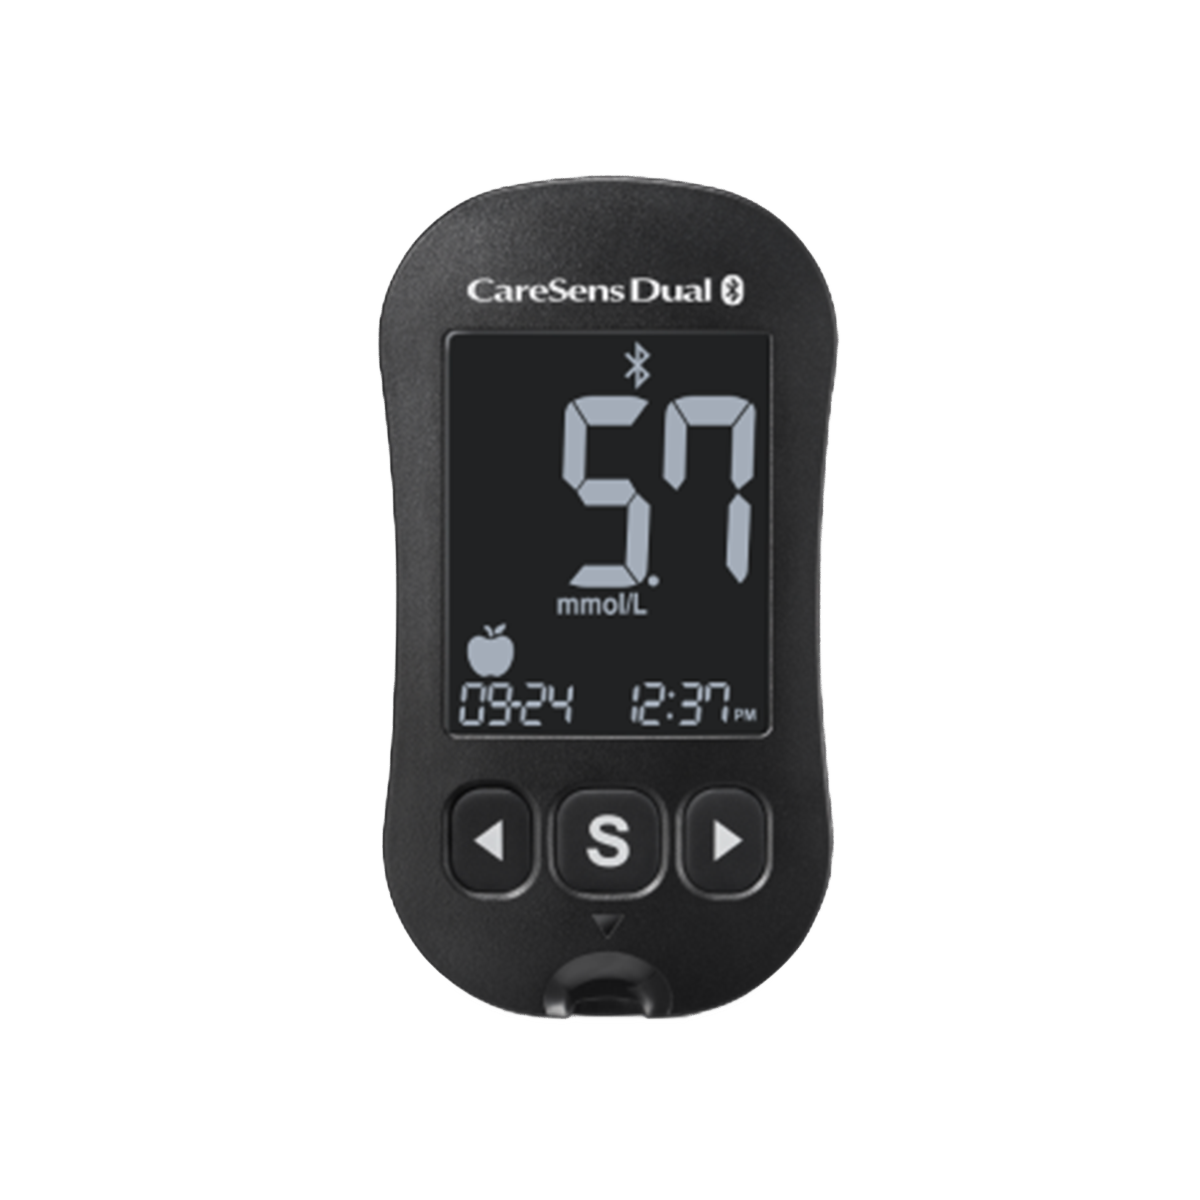
CareSens Dual — the only NZ-funded meter that tests both glucose AND ketones
⚠️ NZ note: The CareSens Dual is the only Pharmac-funded meter in New Zealand that tests both blood glucose AND blood ketones. It requires CareSens PRO strips for glucose (not regular CareSens N strips) and KetoSens strips for ketone testing. Do not use standard CareSens N strips in this meter.
📦 Which Test Strips Does It Use?
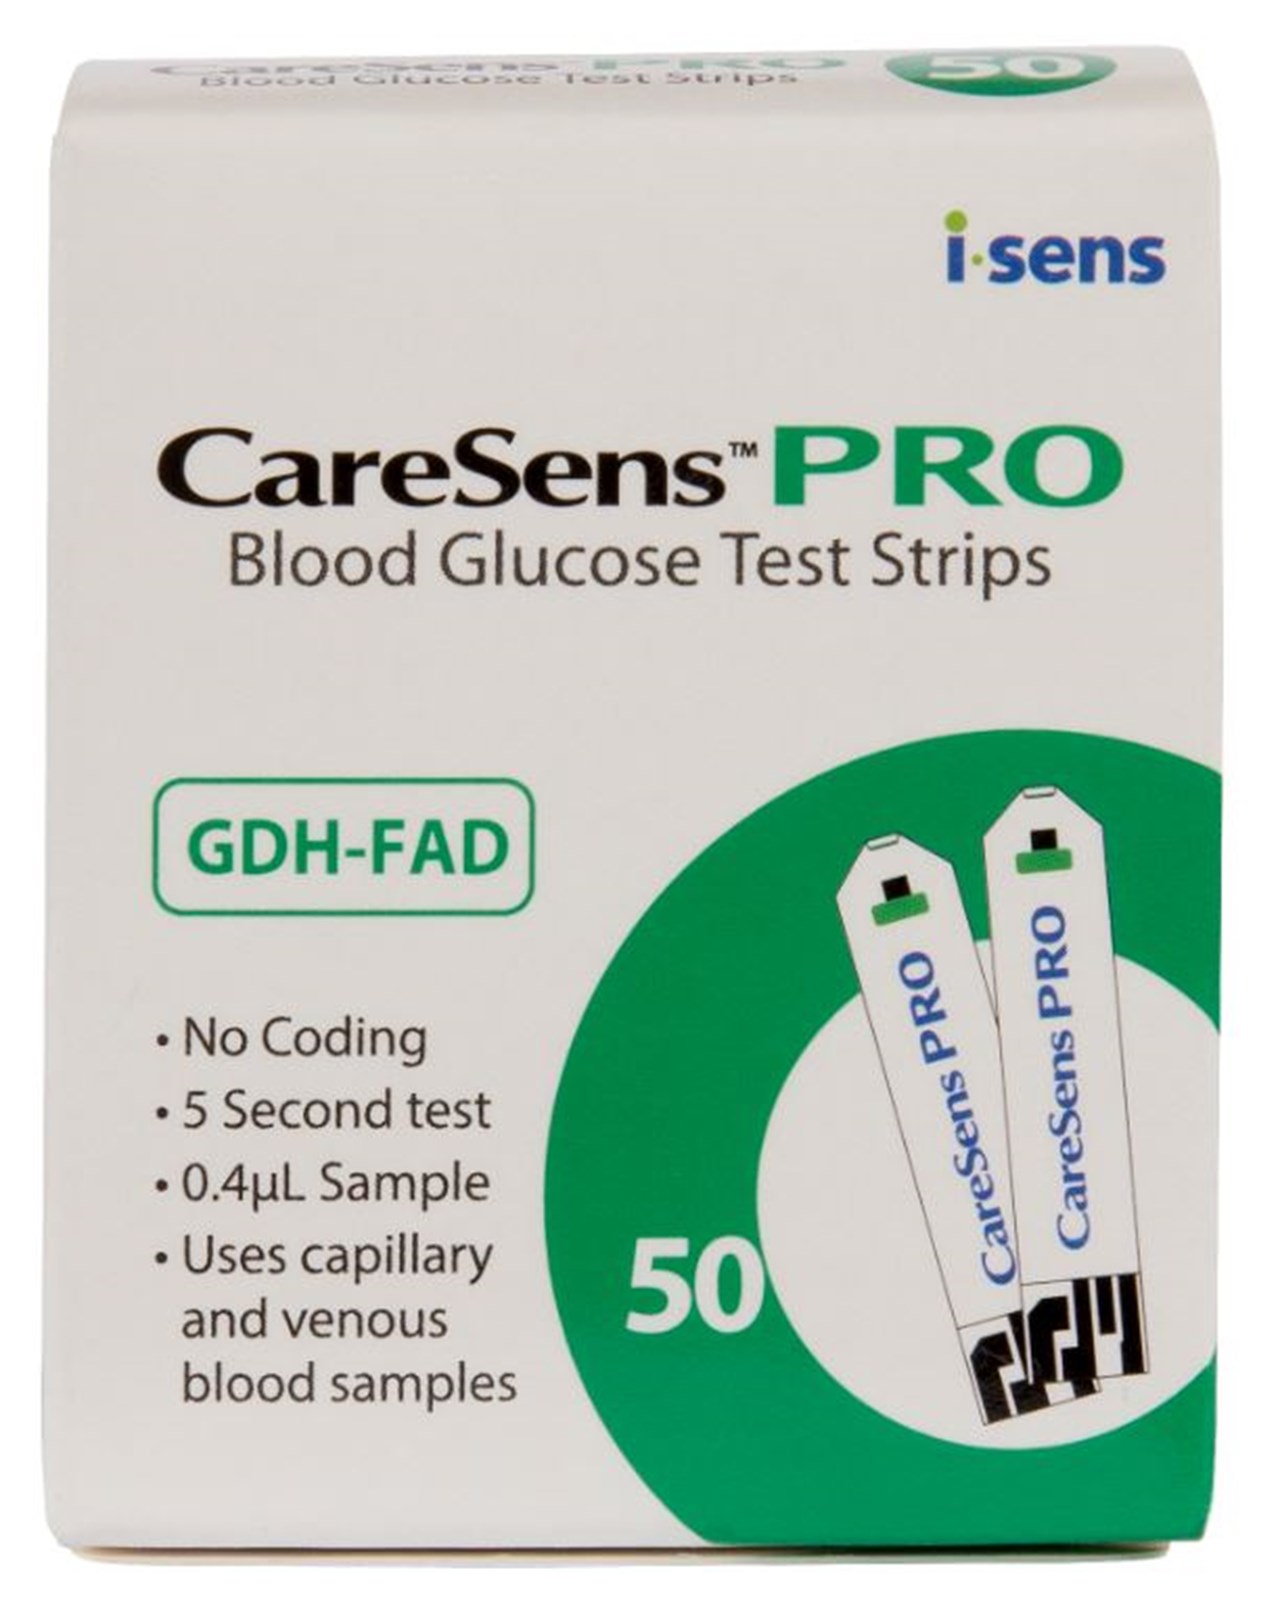
CareSens PRO Strips
For blood glucose testing
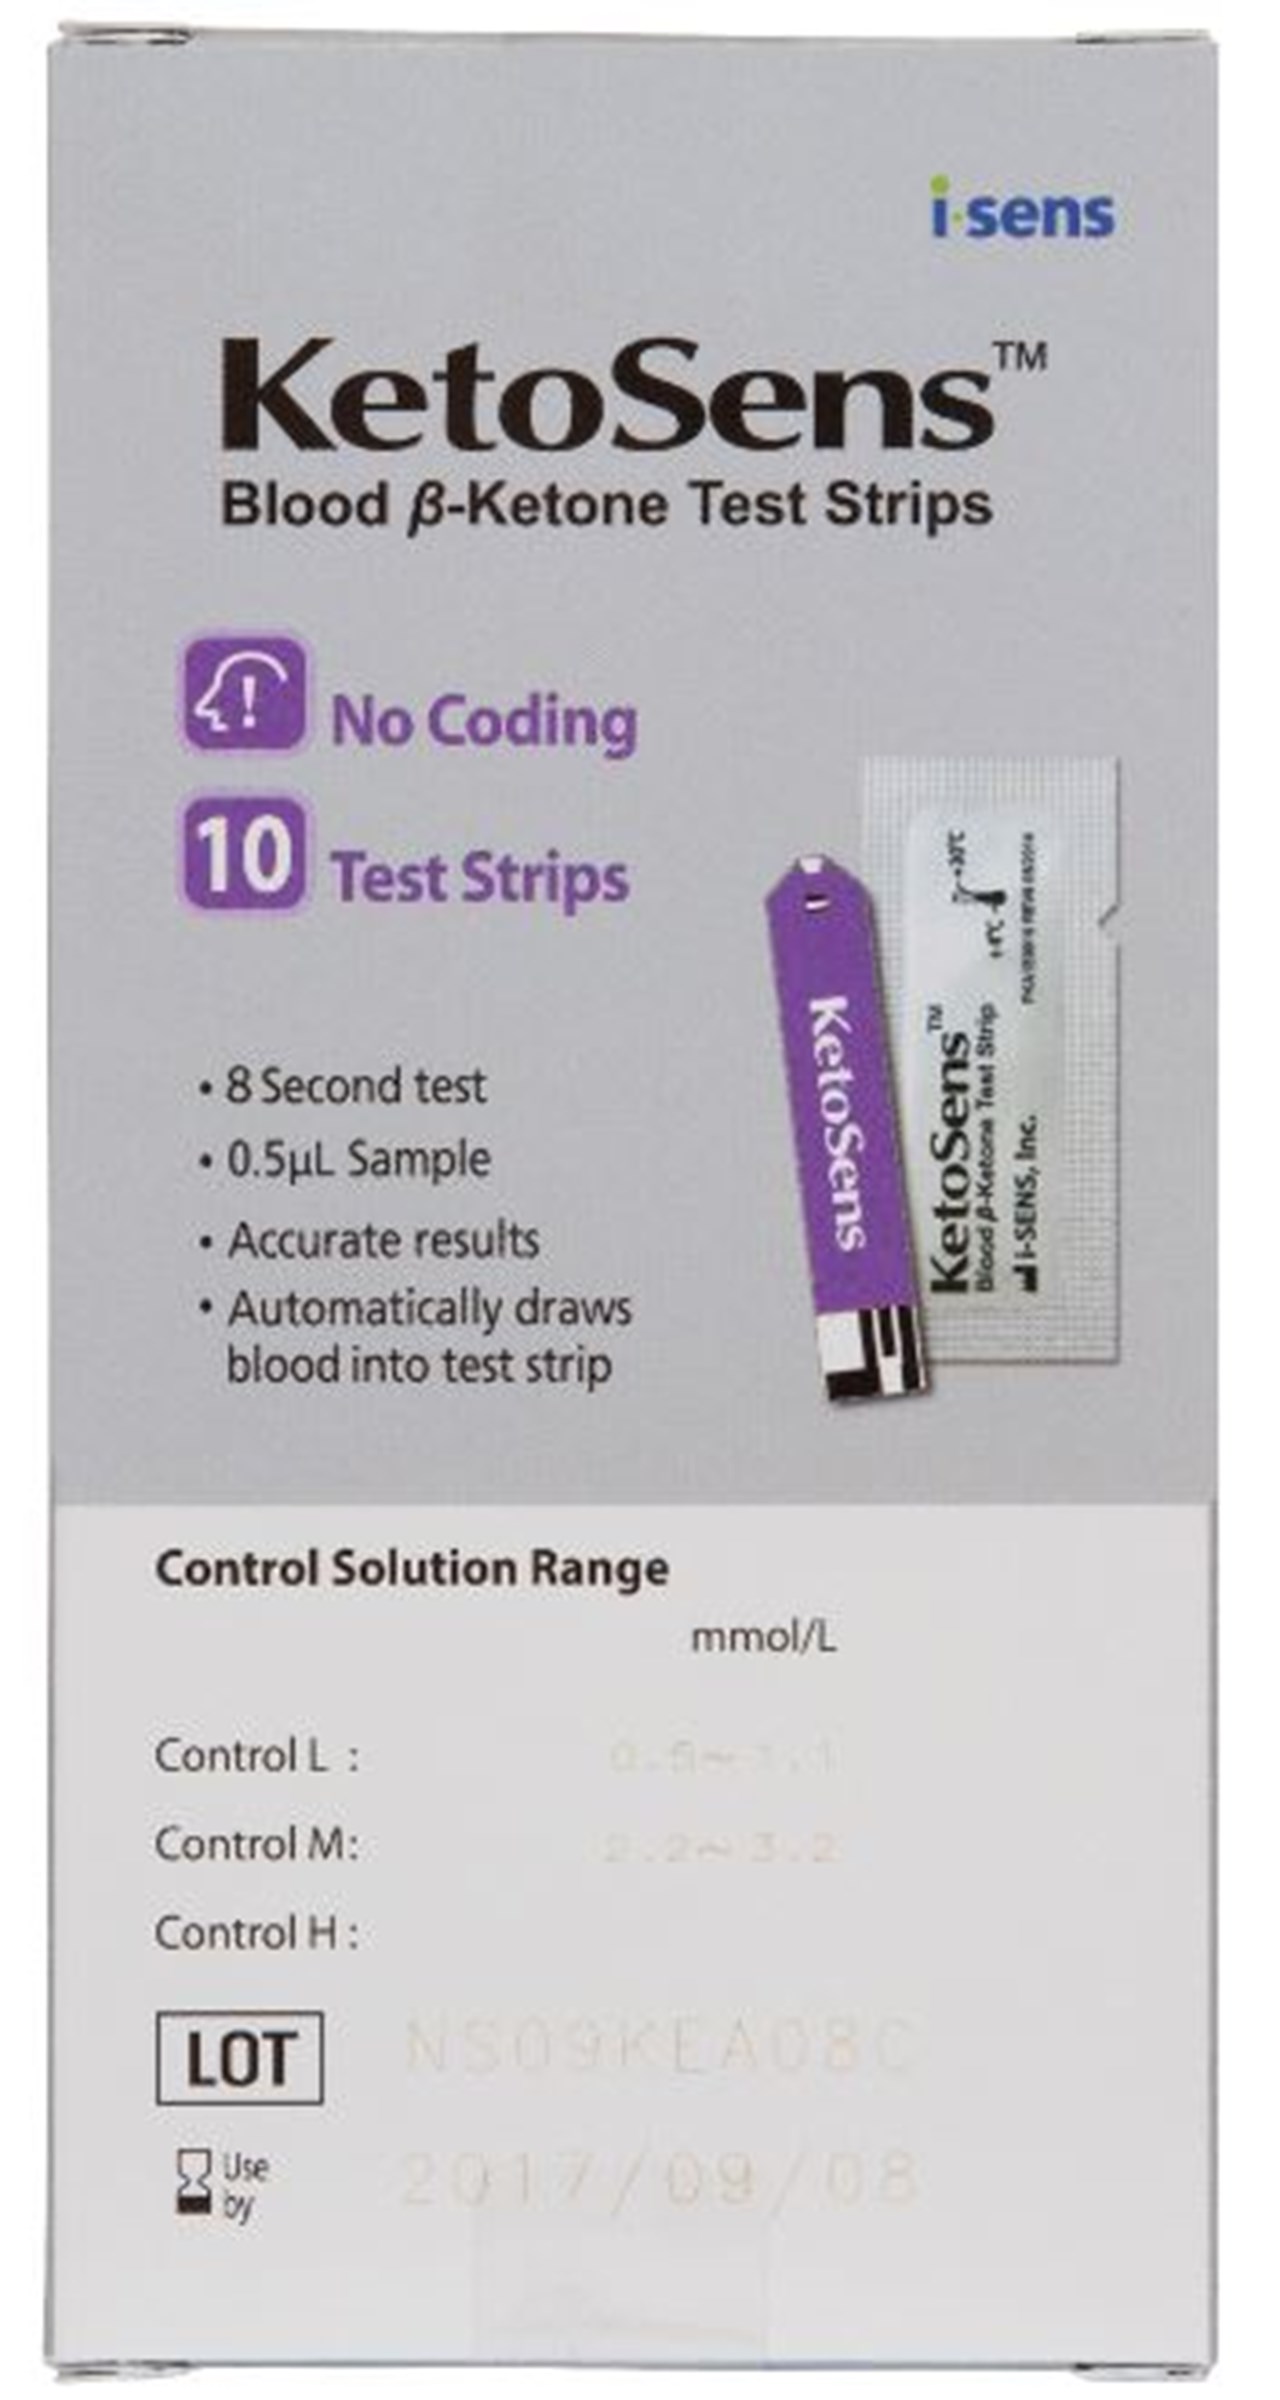
KetoSens Strips
For blood ketone testing
📲 How to Test Blood Glucose (CareSens PRO strips)
- Insert a CareSens PRO glucose strip into the meter port. The meter turns on automatically.
- Wash and dry hands. Prick the side of a fingertip.
- Touch the blood drop to the tip of the strip. Result shows in 5 seconds.
🩸 How to Test Blood Ketones (KetoSens strips)
- Insert a KetoSens ketone strip into the meter — the meter automatically switches to ketone mode.
- Wash and dry hands. Prick the side of a fingertip.
- Touch the blood drop to the tip of the strip. Result shows in 10 seconds in mmol/L.
- See the Ketone Result Guide below for what to do with your result.
📱 The CareSens Dual has Bluetooth — connect to the SmartLog app to track and share your results with your diabetes team.
3. Freestyle Libre 3 Plus (Flash Glucose Monitor)

FreeStyle Libre 3 Plus — wear for 14 days, scan with phone
- 1Applying the sensor: Clean and dry the back of your upper arm. Open the applicator, remove cap, and press firmly onto skin until it clicks. The sensor will stick in place — wear for up to 14 days.
- 2Warm-up period: The Libre 3 starts streaming glucose data to your phone automatically within 60 minutes — no scanning needed (unlike earlier Libre models).
- 3Reading your glucose: Open the LibreLink app on your phone — your current glucose, a trend arrow, and 8-hour history are displayed. Alarms alert you to highs and lows.
- 4Confirm with finger prick when: glucose is rapidly changing, you feel hypo symptoms but sensor shows normal, or before making treatment decisions.
- 5After 14 days, remove the sensor by peeling the edge up gently. Apply a new sensor to the other arm.
4. Dexcom ONE+ (Real-Time CGM)

Dexcom ONE+ — funded CGM for eligible NZ patients
- 1Clean the back of your upper arm or abdomen. Insert the sensor applicator and press down firmly until it clicks. The inserter removes automatically leaving the small filament under the skin.
- 22-hour warm-up period required after insertion. The Dexcom app will notify you when it is ready.
- 3View glucose readings, trends, and set alerts on the Dexcom ONE app. Share data with your diabetes care team if connected.
- 4Remove after 10 days by peeling gently from the skin. Dispose of sensor in general waste. Apply new sensor to alternate site.
5. Dexcom G7 (Real-Time CGM)

Dexcom G7 — all-in-one, 30-minute warm-up
🩺 What is the Dexcom G7?
The Dexcom G7 is a real-time CGM (Continuous Glucose Monitor) that measures glucose every 5 minutes. It is the most compact Dexcom sensor available, with the transmitter built directly into the sensor. It is commonly used by people with Type 1 or Type 2 diabetes on insulin in New Zealand. Note: The Dexcom G7 is not currently funded by Pharmac — check with your diabetes nurse or endocrinologist for current funding status.
📦 What’s in the box?
- Dexcom G7 sensor (all-in-one — no separate transmitter)
- Adhesive patch/overtape
- Instructions for use
You will also need: A compatible smartphone with the Dexcom G7 app (iOS or Android), or a Dexcom receiver.
📲 How to Apply the Dexcom G7 Sensor
- Choose a site: Back of the upper arm (preferred) or abdomen. Avoid areas with scars, tattoos, or irritation.
- Clean the skin: Wash with soap and water, then wipe with an alcohol wipe. Allow to dry completely (30 seconds).
- Prepare the applicator: Remove the sensor from the packet. Remove the blue needle cap by twisting and pulling — do not remove the orange safety guard yet.
- Apply the sensor: Hold the applicator against the skin. Remove the orange safety guard. Press the button firmly until you hear a click.
- Remove the applicator: Pull the applicator straight up and away. The sensor and adhesive remain on the skin.
- Start the session in the app: Open the Dexcom G7 app → tap Start Sensor → scan the QR code on the sensor packet or manual enter the code → follow on-screen prompts.
- Warm-up period: Wait approximately 30 minutes for the G7 warm-up (much shorter than older models). You will receive a notification when readings begin.
📊 Reading Your Glucose and Alerts
- Readings appear every 5 minutes on your phone or receiver.
- A trend arrow shows if glucose is rising, falling, or stable.
- Set low and high glucose alerts in the app — recommended: low alert at 4.0 mmol/L, urgent low at 3.1 mmol/L.
- The sensor lasts 10 days, then must be replaced.
- You can share readings with a carer or family member using Dexcom Follow.
- Always confirm with a fingerprick blood glucose test before treating low blood sugar or making insulin dose decisions if your symptoms don’t match the reading.
6. Dexcom G6 (Real-Time CGM)

Dexcom G6 — sensor + reusable transmitter, 2-hour warm-up
🩺 What is the Dexcom G6?
The Dexcom G6 is a widely used real-time CGM. Unlike the G7, the G6 has a separate reusable transmitter that clips onto the sensor. The sensor lasts 10 days and the transmitter is replaced every 90 days. It is compatible with some insulin pump systems. Note: The Dexcom G6 is not currently funded by Pharmac — check with your diabetes nurse or endocrinologist for current funding status.
📦 What’s in the box?
- Dexcom G6 sensor with applicator
- Dexcom G6 transmitter (separate — reusable for ~90 days)
- Instructions for use
You will also need: A compatible smartphone with the Dexcom G6 app (iOS or Android), or a Dexcom receiver.
📲 How to Apply the Dexcom G6 Sensor
- Choose a site: Abdomen (adults) or upper buttocks (children 2–17 years). Back of upper arm is approved for adults. Avoid waistband area, scarring, or active insulin injection sites.
- Clean the skin: Wash with soap and water, wipe with an alcohol wipe, and allow to dry fully.
- Apply the sensor: Remove the sensor applicator from packaging. Peel off the adhesive backing. Press firmly against the chosen skin site. Press the dark button on the applicator until you hear and feel two clicks. Lift the applicator straight up.
- Attach the transmitter: Slide the transmitter into the sensor holder until it clicks into place.
- Start the sensor in the app: Open the Dexcom G6 app → tap Start Sensor → enter the sensor code printed on the sensor label (or select “No Code” if label is unreadable) → follow prompts.
- Warm-up period: Wait 2 hours for the G6 to warm up before readings begin.
📊 G6 Readings and Key Differences from G7
- Readings every 5 minutes, with trend arrows.
- Sensor lasts 10 days, transmitter lasts ~90 days.
- The G6 does not require calibration if you enter the sensor code. Optional fingerprick calibration can improve accuracy.
- Compatible with Tandem t:slim X2 insulin pump (closed-loop) and Omnipod 5 in some countries — check compatibility with your diabetes team.
- Urgent low alarm at 3.1 mmol/L cannot be turned off (safety feature).
- Use Dexcom Follow to share readings with family or carers.
- G7: All-in-one (no separate transmitter), 30-min warm-up, upper arm preferred, smaller.
- G6: Separate reusable transmitter, 2-hour warm-up, abdomen preferred, compatible with more pump systems.
- Both last 10 days per sensor and read every 5 minutes.
7. Ketone Test Strips — When and How to Use
KetoSens Blood Ketone Strips — used with the CareSens Dual meter
⚠️ What are ketones?
Ketones are produced when the body breaks down fat for energy, which can happen when there is not enough insulin or during illness. High ketone levels can lead to diabetic ketoacidosis (DKA), which is a medical emergency. Testing ketones is important for people with Type 1 diabetes, and sometimes Type 2 diabetes on insulin, particularly when blood glucose is consistently high or during illness.
🩸 Types of Ketone Testing Available in New Zealand
- Urine ketone strips (e.g., Ketostix, Mission Ketone) — dip in urine, read colour change after 15 seconds. Less accurate, shows ketones from 1–2 hours ago. Available at most pharmacies.
- Blood ketone meters (CareSens Dual — the NZ-funded meter for ketone testing) — use a lancet and ketone-specific test strip. More accurate and real-time. Funded for people with Type 1 diabetes (check Pharmac schedule).
📋 When to Test for Ketones
- Blood glucose is above 15 mmol/L and you feel unwell
- You are vomiting or cannot eat (sick day rules)
- You have missed insulin doses
- You have symptoms of DKA: excessive thirst, frequent urination, nausea, abdominal pain, fruity-smelling breath, confusion
- Your diabetes team has instructed you to test regularly
- Type 1 diabetes: test ketones whenever blood glucose is over 14 mmol/L
🧪 How to Use a Urine Ketone Strip (e.g., Ketostix)
- Wash hands. Collect a small urine sample in a clean container (or pass urine directly over the strip).
- Dip the test end of the strip into the urine for 1 second only.
- Remove the strip and hold it horizontally. Do not shake off excess urine.
- Wait exactly 15 seconds, then compare the colour of the strip to the colour chart on the bottle label.
- Record the result and time.
- Dispose of the strip in a rubbish bin — do not flush.
💉 How to Use a Blood Ketone Strip (KetoSens strips in the CareSens Dual meter)
- Wash and dry hands thoroughly.
- Insert a ketone test strip (blue/yellow-coded — not the glucose strip) into the meter.
- Prick the side of a fingertip with a lancet.
- Touch the edge of the strip to the blood drop — blood will be drawn in automatically.
- Read the result after 10 seconds.
- Dispose of the lancet in a sharps container and the strip in a rubbish bin.
⚠️ Always use ketone strips specifically — glucose strips cannot measure ketones even in the same meter.
🚨 Ketone Result Guide — What to Do
| Blood Ketones (mmol/L) | Urine Ketones | Action Required |
|---|---|---|
| Below 0.6 | Negative / Trace | ✅ Normal — continue monitoring if glucose is high |
| 0.6 – 1.5 | Small to Moderate | ⚠️ Caution — drink water, take corrective insulin per your sick day plan. Retest in 1–2 hours. Contact your diabetes team if not improving. |
| 1.5 – 3.0 | Moderate to Large | 🚨 High risk — contact your diabetes team or GP urgently. Take corrective insulin if advised. Monitor closely. |
| Above 3.0 | Large | 🏥 CALL 111 or go to Emergency — possible DKA. This is a medical emergency. |
CGM vs Blood Glucose Meter — Which Should I Use?
• No finger pricking needed
• Real-time trends and alerts
• Best for people on insulin
• Funded for eligible patients
• Lower cost per test
• Precise point-in-time reading
• Good for confirming CGM readings
• Required when CGM unavailable
This information is for educational purposes only and is not a substitute for personalised advice from your doctor or pharmacist. Always seek professional guidance before making changes to your medications.